
THANK YOU FOR CHOOSING AHF PRODUCTS FLOORING
If properly installed and cared for, your new flooring will be easy to maintain and and will look great for years to come. These directions are based on industry standards and best practices. Failure to follow these installation instructions may result in damage to the flooring and void the floor’s warranty.
- For complete warranty information call 1-866-243-2726 or go to www.ahfproducts.com.
- For technical or installation questions, or to request a Safety Data Sheet, please call 1-866-243-2726 or visit www.floorexpert.com our technical website.
- For general questions or comments, please visit us at www.ahfproducts.com or call 1-866-243-2726
| WARNING: EXISTING IN-PLACE RESILIENT FLOOR COVERING AND ASPHALTIC ADHESIVES. DO NOT SAND, DRY SWEEP, DRY SCRAPE, DRILL, SAW, BEADBLAST, OR MECHANICALLY CHIP OR PULVERIZE EXISTING RESILIENT FLOORING, BACKING, LINING FELT, ASPHALTIC “CUTBACK” ADHESIVE, OR OTHER ADHESIVE. These existing in-place products may contain asbestos fibers and/or crystalline silica. Avoid creating dust. Inhalation of such dust is a cancer and respiratory tract hazard. Smoking by individuals exposed to asbestos fibers greatly increases the risk of serious bodily harm. Unless positively certain that the existing in-place product is a non-asbestos-containing material, you must presume it contains asbestos. Regulations may require that the material be tested to determine asbestos content and may govern removal and disposal of material. See current edition of the Resilient Floor Covering Institute (RFCI) publication Recommended Work Practices for Removal of Resilient Floor Coverings for instructions on removing all resilient floor covering structures or contact your retailer or AHF Products at 866 243 2726. AHF floor coverings and adhesives do NOT contain asbestos. |
Do not wash or scrub the new flooring for at least 5 days after the installation. This will allow the tile to become “seated” in the adhesive and prevent excess moisture and cleaning agents from interfering with the adhesive bond.
Installation
Location: All grade levels
Fitting: All Methods
Tools
- Utility knife
- Pencil
- Tape measure
- Chalk and chalk line
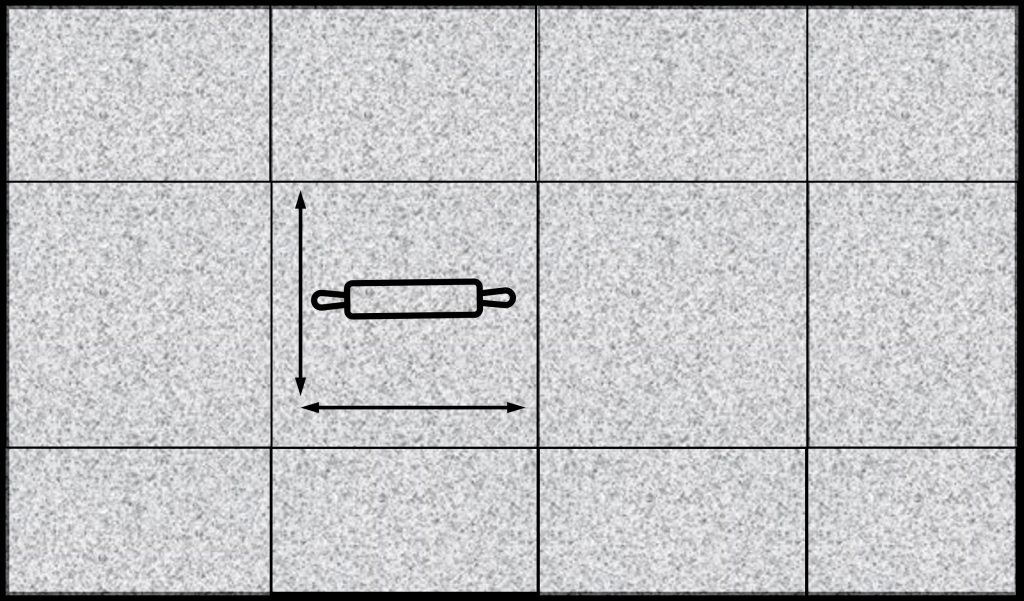
- Rolling pin
- Carpenter’s square
- Liquid underlayment or embossing leveler
- S-185 Latex Primer
Keys to Successful Peel & Stick Installation
- Most installations will need approximately a 10% cutting allowance added to the square footage of the room.
- Proper conditioning of the job site is necessary. Flooring tiles should not be exposed to sudden changes in temperature.
- Store, transport and handle the flooring tiles in a manner to prevent any distortions. Distortions will not disappear over time. Store cartons flat, never on edge. Ensure that the flooring tiles are lying flat during installation.
- Protect the floor from heavy-rolling loads, other trades, and movement of appliances by using sheets of plywood or similar.
- When installing over an existing resilient floor, lay out the installation so the new seams are a minimum of 6˝ away from the original seams.
- When installing over tile floors, seams should fall in the center of the tile.
- When using tile from two or more cartons, check to be sure all pattern and lot numbers are the same for proper color match.
- Tile products with directional arrows on the back should be installed with the arrows all pointing in the same direction. Groutable, rounded edge tiles may be installed with arrows pointing in random directions.
- Do not wet wash tile for at least five days after installation. This will allow the adhesive under the tile to dry and prevent excess moisture and cleaning agents from interfering with the adhesive bond.
- Make sure tiles are butted tightly at all edges to prevent separation.
Suitable Substrates
All substrates listed below must be properly prepared and meet certain requirements. There may be other exceptions and special conditions (as noted below) for these substrates to be suitable for the glue down installation system.
- Concrete – dry and smooth on all grade levels
- Tiles can be installed over a painted concrete floor.
- Suspended wood subfloors with approved wood underlayments – must have minimum of 18˝ well ventilated crawl space underneath including:
- Properly prepared OSB
- Lauan Plywood: Use only Type 1 lauan exterior grade “BB” or “CC” for underlayment. The use of lesser grades of lauan plywood is unacceptable and may cause severe problems when used as an underlayment, including discoloration, indentation, loss of bond and delamination.
NOTE: The use of lauan plywood and other extremely porous wood underlayments will reduce the flash and working time of adhesives. It is best to apply an acrylic-based primer-sealer to any porous substrate prior to installing sheet vinyl. A manufacturer’s certification of lauan grade must accompany any claim involving the use of a lauan underlayment.
- Single-layer, fully-adhered, existing resilient floors – must not be foam-backed or cushion-backed
- Ceramic tile, Terrazzo, Marble
- Ensure that the tiles are firmly bonded.
- Polymeric Poured (seamless) Floors
DO NOT INSTALL OVER
- Existing resilient tile floors that are below grade
- Existing cushion-backed vinyl flooring
- Carpet
- Hardwood flooring installed directly over concrete
- Existing floating floors
- Particleboard 40lb. density or waferboard
Job Conditions/Preparations
- Resilient flooring should be stored indoors in temperatures between 30° F (-1° C) and 85° F (29° C), as long as the flooring is protected from the weather and the area is dry, out of direct sunlight and free of internal combustion.
- Condition tile in the room in which you plan to install for 48 hours. Keep room at minimum of 65° F (18° C) during that time and during installation. After installation, temperature should not fall below 65° F (18° C) for the first 48 hours, and not below 55° F (13° C) after that.
- If room is heated by radiant coils in the subfloor, the temperature of the floor surface should not exceed 85° F (29° C).
- The subfloor should be level, clean, and free of wax, grease, oil or dust.
- If necessary, patch or fill any cracks in the subfloor with Armstrong patch or latex underlayment.
- If installing over existing vinyl, use liquid underlayment or embossing leveler to smooth any texture or embossing on the old floor.
- Install over smooth, well-bonded resilient floors, ceramic, terrazzo, marble or over dry concrete and wood floors with a plywood overlay.
SAFETY AND CLEAN UP
Wet adhesive should be cleaned up immediately with soap and water on a clean cloth. Dried adhesive may require the use of a solvent-based adhesive cleaner
Installation Preparation
Remove baseboard, quarter-round moldings, wall base, appliances and furniture from room.. After preparation work, sweep and vacuum the entire work area to remove all dust and debris.
Whenever possible, plan the layout so that the joints in the tiles do not fall on top of joints or seams in the existing substrate. Do not install over expansion joints. Avoid installing pieces less than half the width or length of the tile.
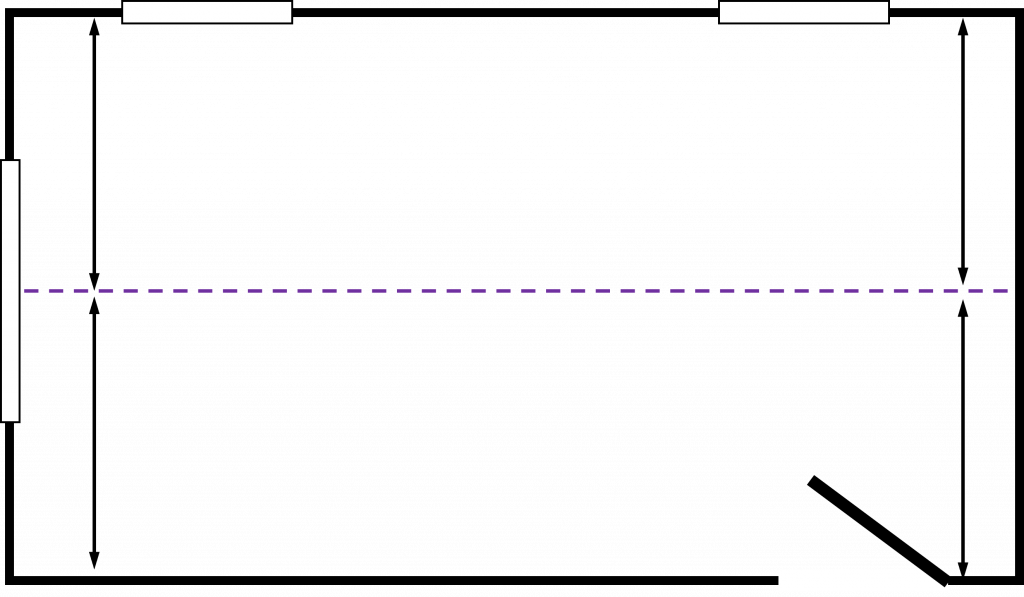
Determine which direction the tile will run. Find the center of each of the end walls (the walls perpendicular to the long dimension of the planks and place a pencil mark on the floor. Connect these points by striking a chalk line down the center of the room. Do a dry layout of tiles from the center line to the wall running parallel to the long direction of the tiles to determine the width of the last row of tiles (refer to Figure 1).
Plan The Layout
For more information, see: Layout and Fitting Resilient Tile
Step 1: Find the center of each of the end walls and strike a chalk line at the center of the room.
Step 2: At the midpoint of the center line, create a perpendicular line using a carpenter’s square.
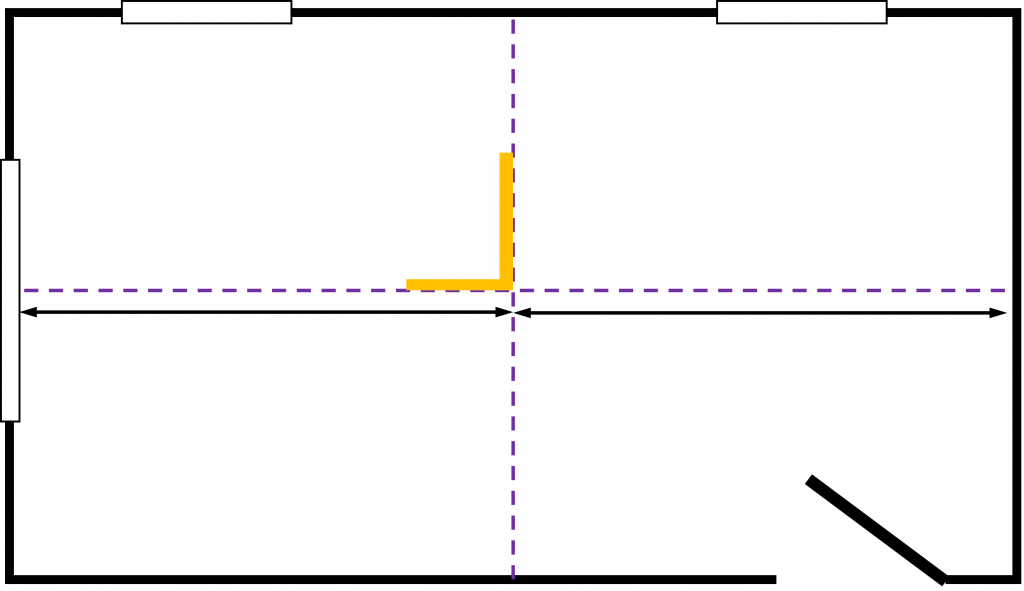
Step 3: Leave release paper on back of tile, and position tiles in one quadrant of the room to determine border tile size. Shift the starting line(s) 1/2 the dimension of the tile; i.e.. shift 6″ for a 12″ tile to maximize border tile size, if necessary.
Install Tile
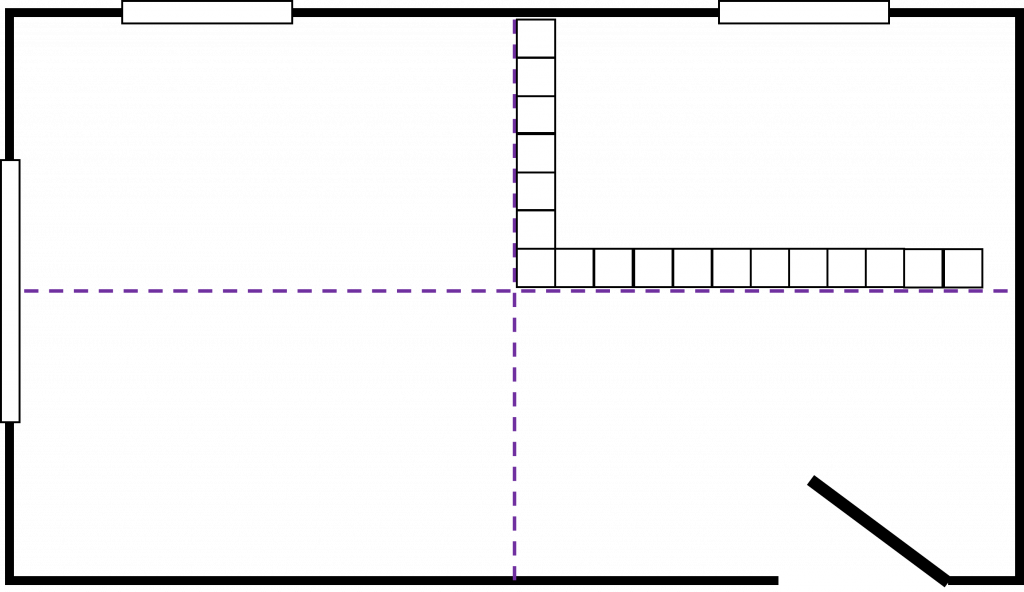
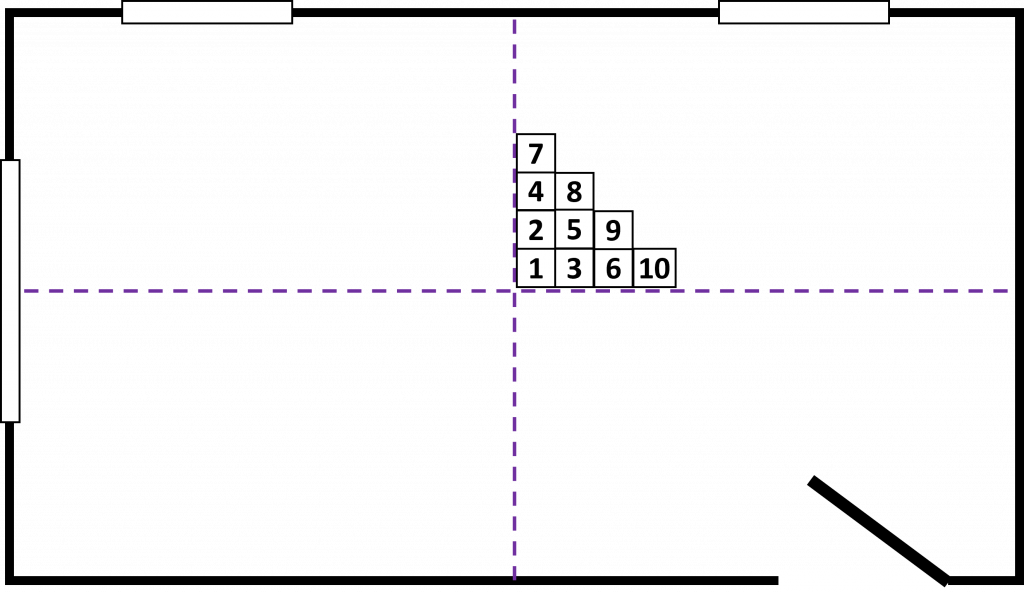
Step 4: Peel release paper from tile and install at intersection. Install one quadrant of tile at a time. Make sure arrows on back of all tiles point in the same direction. For rounded edge groutable tiles, arrows should be randomized. Lay tiles in pattern shown below, using chalk lines as a guide. Make sure tiles are butted tightly at all edges to prevent separation.
Cutting the border tile
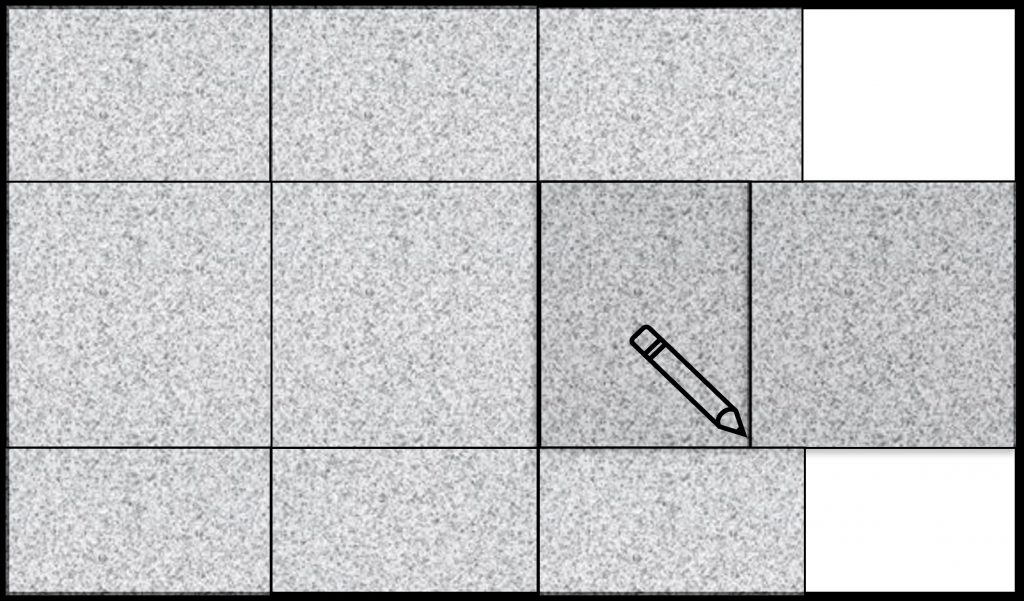
Step 5: For straight cuts place a loose tile (A) face up exactly on top of the last full tile, making sure the arrows are pointed in the proper direction. Place another full tile (B) on top of tile (A) with its edge against the wall. Using tile (B) as a guide, mark the face of tile (A) with a pencil. Cut border tiles with utility knife. For irregular cuts, make a pattern and transfer it to a tile.
Finish
Step 6: Roll installed tiles in both directions to bond to floor. DO NOT wash floor for five days. Replace wall base and moldings.
Precautions for All Installation Methods
- When moving appliances or heavy furniture, lay a plywood panel on the floor and “walk” the item across it.This protects the floor from scuffing and tears.
- Use floor protectors on furniture to reduce indentation. The heavier the item, the wider the floor protector needed.