
Following a regular and well-planned maintenance program will ensure a beautiful floor and increase its service life.
Click here for more insight into creating a Flooring Maintenance Plan for Your Facility.
Helpful Tips
- SAFETY ZONE TILE employs an embossed surface embedded with grit. The Fast Start Factory Finish makes initial maintenance quick and easy and does not require removal after installation. Do not use too much floor polish because it will reduce the slip retardant characteristics of the tile’s surface. As a guideline, maintaining 4 to 5 coats at all times should be sufficient.
- Safety Zone tile should be maintained with scrubbing brushes as machine pads are unable to reach into the textured surface to remove dirt, particles and residues.
- Always use proper signage while working, especially during wet maintenance.
- Use walk-off mats at every entrance to help control grit and soil; clean walk-off mats regularly. We recommend mats without latex or rubber backing since these backings can cause permanent discoloration.
- Protect the floor with plywood or Kraft paper during construction and while moving equipment and furniture.
- Select proper non-staining furniture rests and casters; the contact area should be smooth, flat, and firmly on the floor at all times.
- After removing loose dirt and debris, use a damp mop and a properly diluted cleaner for daily maintenance. Do not use an excessive amount of liquid.
- When using disinfectants, always follow manufacturer’s instructions for use to avoid slippery conditions and possible discoloration.
- Protect your floor by avoiding the use of brown and black pads, or stiff-bristled, highly abrasive brushes.
- A scrubbing brush may be used in place of a pad to remove dirt and residue.
Initial Maintenance
Immediately After Installation
- Newly installed flooring should not be exposed to rolling load traffic for at least 72 hours after installation to allow the adhesive to dry.
- Do not wet wash, machine scrub, or strip the floor for at least five days after installation. Excess moisture can interfere with the adhesive and/or seam treatments.
- When performing wet maintenance, always use proper signage and prohibit traffic until the floor is completely dry.
- Remove any adhesive residue with a clean, white cloth dampened with denatured alcohol.
- Sweep, dust mop or vacuum the floor to remove loose dust, dirt, and debris.
- Damp mop the floor with a properly diluted cleaner, like S-485 Commercial Floor Cleaner.
- Apply at least two coats of a high-quality commercial floor polish, like S-480 Commercial Floor Polish to temporarily protect the floor until regular maintenance procedures can begin.
- In areas where the flooring will be exposed to heavy traffic and/or staining agents, we recommend applying 1 or 2 coats of a stain resistant sealer prior to the application of polish.
Preparation for Commercial Traffic
 Scrub the floor using a rotary machine or auto scrubber (300 rpm or less) with a properly diluted cleaner
- Use a brush equivalent to a 3M® 5100 red pad for a light scrub
- Use a brush equivalent to a 3M® 5300 blue pad, for a deep scrub
- Thoroughly scrub the floor, passing slowly in each direction.
- If the floor is badly soiled and/or scratched, strip it using the procedure above but use a properly diluted stripping solution in place of the cleaner.
- PLEASE NOTE: The use of aggressive strippers such as mop-on/mop-off, no-scrub and no-rinse strippers is not recommended on tile floors less than two years old because they may affect the adhesive bond.
- Rinse the floor with fresh, clean water and allow the floor to dry.
- Apply 3 to 4 coats of high-quality floor polish, like S-480 Commercial Floor Polish.
- In areas where the flooring will be exposed to heavy traffic and/or staining agents, we recommend applying 1 or 2 coats of a stain resistant sealer prior to the application of polish.
Daily & Periodic Maintenance
Sweep & Damp Mop in Areas with Light Soiling
- Sweep, dust mop or vacuum the floor to remove loose dust, dirt, and debris.
- Damp mop the floor with a properly diluted cleaner, like S-485 Commercial Floor Cleaner, on a regular or daily basis.
Machine Scrub for Heavy Soiling and Corrective Cleaning
- When necessary, after sweeping, dust mopping or vacuuming, scrub the floor using a rotary machine or auto scrubber (300 rpm or less) with a properly diluted cleaner
- Use a brush equivalent to a 3M® 5100 red pad for a light scrub
- Use a brush equivalent to a 3M® 5300 blue pad, for a deep scrub
- Thoroughly scrub the floor, passing slowly in each direction
- Rinse the floor with fresh, clean water and allow the floor to dry.
- If needed, additional coats of floor polish may be applied. If there is sufficient base of polish remaining (3 to 5 coats), buff, spray buff or burnish to restore gloss.
Restorative Maintenance – Stripping Existing Floor Polish
- Mix stripping solution to the appropriate dilution, depending on floor finish buildup.
- Cordon off areas to be stripped and apply liberal amounts of solution uniformly on floor with mop.
- Let stripping solution soak for the appropriate amount of time recommended by the stripper manufacturer.
- Keep areas to be stripped wet. Rewet if necessary.
- Machine scrub the floor (300 rpm or less), with a brush equivalent to a 3M 5300 blue pad, to break up the polish film. Do not allow stripping solution to dry on the floor
- Remove dirty stripping solution with a wet vacuum or mop.
- Rinse the floor with fresh, clean water and allow the floor to dry.
- Apply 3 to 5 coats of high-quality floor polish, like S-480 Commercial Floor Polish.
- In areas where the flooring will be exposed to heavy traffic and/or staining agents, we recommend applying 1 or 2 coats of a stain resistant sealer prior to the application of polish.
Maintenance Equipment & Accessories
We recommend using the following accessories and equipment as part of a regular and well-planned maintenance program to ensure a beautiful floor and increase its service life.
• Wet mops (microfiber, cotton, synthetic blend)
• Dry mops (microfiber, rayon, polyester, acrylic)
• Polish applicators (optional)
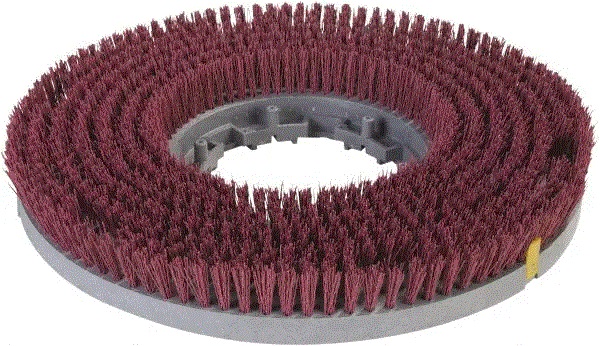 Use a brush equivalent to a 3M® 5100 red pad for a light scrub | 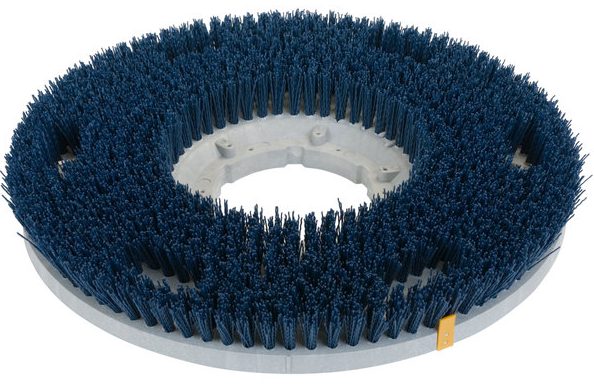 Use a brush equivalent to a 3M® 5300 blue pad Use a brush equivalent to a 3M® 5300 blue padfor a light scrub |
Floor Protection
Guidelines for Floor Protection Devices
- The contact area should be smooth, slightly rounded and large enough to distribute the load evenly without damaging the floor.
- Floor contact devices should be manufactured from non-staining materials.
- Felt glides are recommended on smooth, hard surface. They must be kept clean and properly maintained.
- Nylon glides are recommended on heavily embossed or textured surfaces.
- When using rolling casters, we recommend double wheel options. To avoid damage under the casters, use a non-staining chair mat.
- Furniture, appliances, and equipment should be leveled so that all flooring protection devices rest fully and firmly on the floor.

Walk-Off Mat Strategy
Controlling grit and soil entering your facility at the source before it has a chance to reach the flooring is one of the best preventative measures to take. Studies over the years have shown that properly installed and maintained entrance matting systems significantly reduce the amount of soil and water tracked into the building. Less soil means less wear on your flooring, and reduced maintenance efforts and costs.
It’s recommended that walk-off mats should:
- Have a high-friction, open surface design to knock grit particles from the bottoms of shoes and then trap the particles.
- Be used at all inside and outside entrances, and should be at least as wide as the doorway and 8´ to 12´ long.
- Use mats without latex or rubber backing since these backings can cause permanent discoloration.
- Mats should be cleaned regularly, vacuumed, shaken and/or hosed off frequently.