
CREATE DECORATIVE WALL ELEMENTS WITH AHF PRODUCTS ENGINEERED HARDWOOD PRODUCTS
| ATTENTION INSTALLERS CAUTION: WOOD DUST Sawing, sanding and machining wood products can produce wood dust. Airborne wood dust can cause respiratory, eye and skin irritation. The International Agency for Research on Cancer (IARC) has classified wood dust as a nasal carcinogen in humans. Precautionary Measures: If power tools are used, they should be equipped with a dust collector. If high dust levels are encountered, use an appropriate NIOSH-designated dust mask. Avoid dust contact with eye and skin. First Aid Measures in Case of Irritation: In case of irritation, flush eyes or skin with water for at least 15 minutes. If you have any technical or installation questions, or to request a Safety Data Sheet, please call 866 243 2726 or visit floorexpert.com, our technical website. |
| IMPORTANT HEALTH NOTICE FOR MINNESOTA RESIDENTS ONLY: THESE BUILDING MATERIALS EMIT FORMALDEHYDE. EYE, NOSE, AND THROAT IRRITATION, HEADACHE, NAUSEA AND A VARIETY OF ASTHMA-LIKE SYMPTOMS, INCLUDING SHORTNESS OF BREATH, HAVE BEEN REPORTED AS A RESULT OF FORMALDEHYDE EXPOSURE. ELDERLY PERSONS AND YOUNG CHILDREN, AS WELL AS ANYONE WITH A HISTORY OF ASTHMA, ALLERGIES, OR LUNG PROBLEMS, MAY BE AT GREATER RISK. RESEARCH IS CONTINUING ON THE POSSIBLE LONG-TERM EFFECTS OF EXPOSURE TO FORMALDEHYDE. REDUCED VENTILATION MAY ALLOW FORMALDEHYDE AND OTHER CONTAMINANTS TO ACCUMULATE IN THE INDOOR AIR. HIGH INDOOR TEMPERATURES AND HUMIDITY RAISE FORMALDEHYDE LEVELS. WHEN A HOME IS LOCATED IN AREAS SUBJECT TO EXTREME SUMMER TEMPERATURES, AN AIR-CONDITIONING SYSTEM CAN BE USED TO CONTROL INDOOR TEMPERATURE LEVELS. OTHER MEANS OF CONTROLLED MECHANICAL VENTILATION CAN BE USED TO REDUCE LEVELS OF FORMALDEHYDE AND OTHER INDOOR AIR CONTAMINANTS. IF YOU HAVE ANY QUESTIONS REGARDING THE HEALTH EFFECTS OF FORMALDEHYDE, CONSULT YOUR DOCTOR OR LOCAL HEALTH DEPARTMENT |
Substrates:
Products can be installed over the following wall substrates; drywall, plywood, cement board. All substrates must be sound, clean, dry, smooth, and flat. Do not install over greasy/oily surfaces with extraneous debris.
Adhesives:
A premium urethane construction adhesive is required. Apply adhesive to the back of the plank in a serpentine, or “S” pattern. Use a spacing of 3˝ to 4˝ between serpentine elements. Appy adhesive bead width of approximately 1/4˝.
Tools and Materials:
- Engineered hardwood
- Stud finder
- Chalk line
- Tape measure
- Caulk gun
- Premium urethane construction adhesive
- Bruce® Everseal™ (Products wider than 5˝)
- Air compressor
- Air hose
- Brad nailer
- Miter saw
- Table saw
- Jig saw
- Drill
- Spacers
- Tapping block
- Bruce® Hardwood and Laminate Floor Cleaner
Determine Layout:
For standard installations of engineered hardwood on walls, they can be installed horizontally, vertically, diagonally, and as wainscoting. For best results, lay out the planks on the floor prior to installing on the wall. Planks can be cut prior to installing on the wall. To maintain a random visual keep end joints of the adjacent rows at least 6˝ apart.
Installation Steps for a Horizontal Installation:
- Use a stud finder to find wall studs and with a pencil mark the location of the studs.
- Snap chalk lines on the wall along the length of the studs.
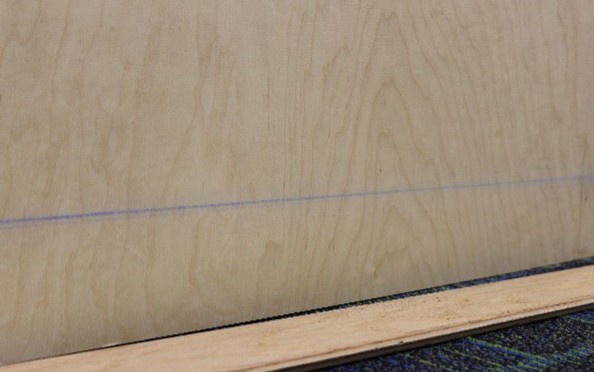
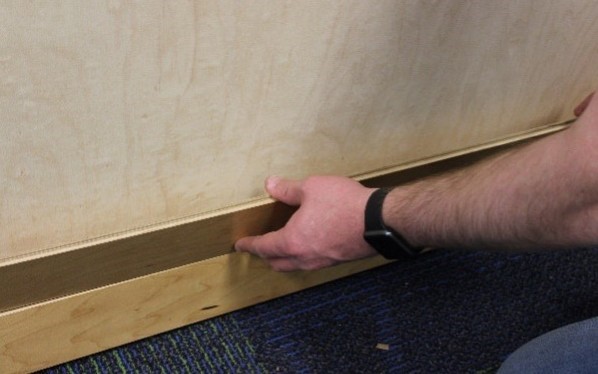
- Snap a horizontal chalk line on the bottom of the wall to maintain a level installation (for uneven subfloors) (Figures 1 and 2)
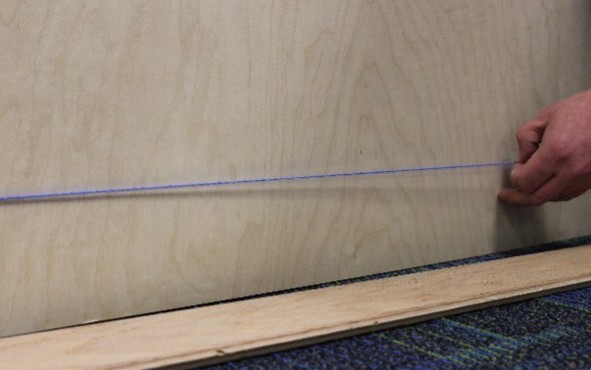
- Using a tape measure, measure (a) the distance from the floor to the ceiling and (b) the length of the wall. These measurements should be used to determine both the amount of engineered hardwood needed for the wall installation AND the spacing of the first and last row of a horizontal installation.
- Open at least 3 cartons of engineered wood to work from.
- Lay out the hardwood on the floor to arrange and see the desired planks visuals and ensure proper blending of the natural variations in the wood.
- Determine if the installation of the engineered hardwood needs to be balanced between the floor and ceiling. This may require lengthwise cutting of the first and last rows.
- Maintain 1/4˝ expansion space around the perimeter of the wall.
- Connect the brad nailer to the air compressor and turn on the air compressor.
- Use 1-1/2˝ to 2˝ long brads.
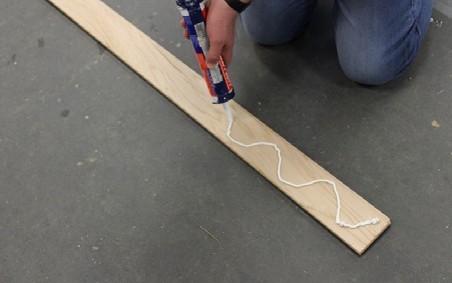
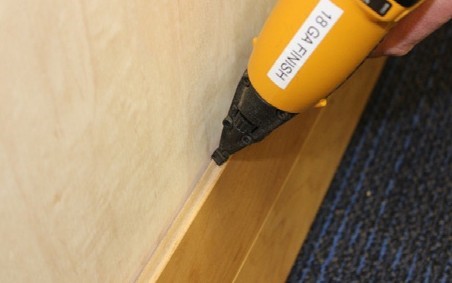
- Place a premium urethane construction adhesive in the caulk gun and cut open the tip of the adhesive tube to achieve a 1/4˝ bead of adhesive.
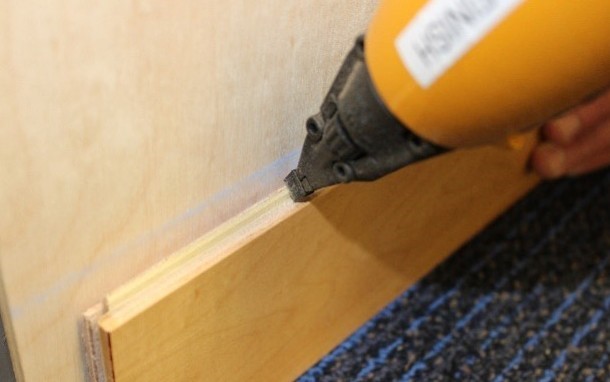
- In a serpentine pattern, apply the adhesive to the back of the initial plank of the first row (for a horizontal installation the first row is the bottom row). (Figure 3)
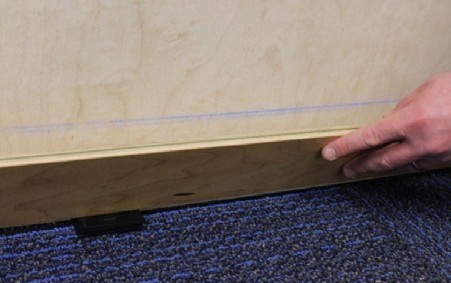
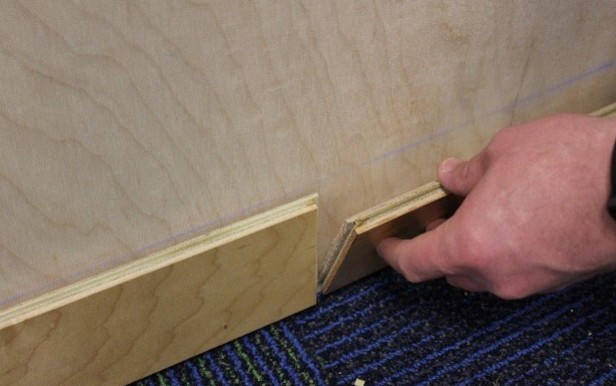
- Place plank on the wall such that the end groove is facing to the left. (Figure 4)
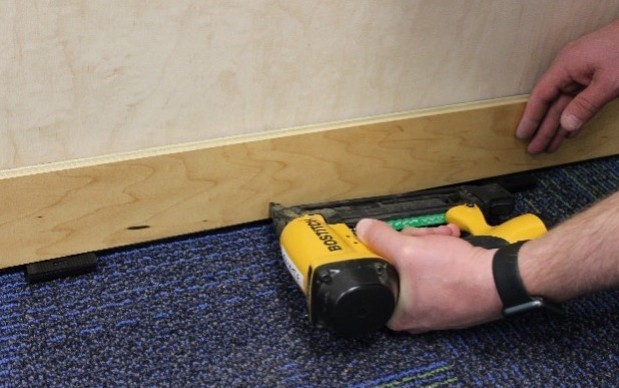
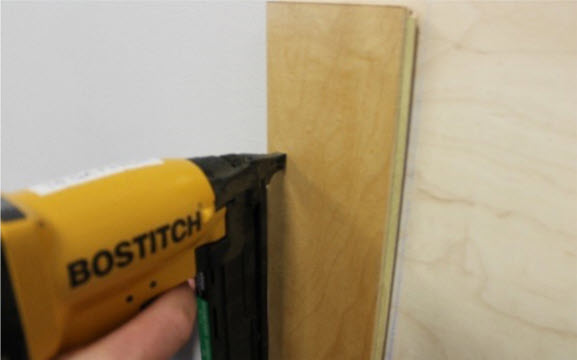
- Face nail the plank at the stud locations and blind nail in the pocket above the tongue. (Figures 5 and 6)
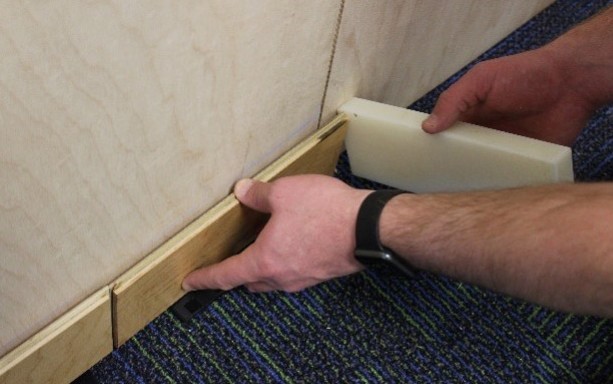
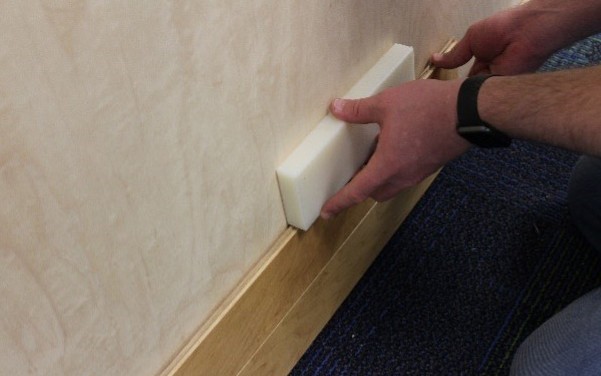
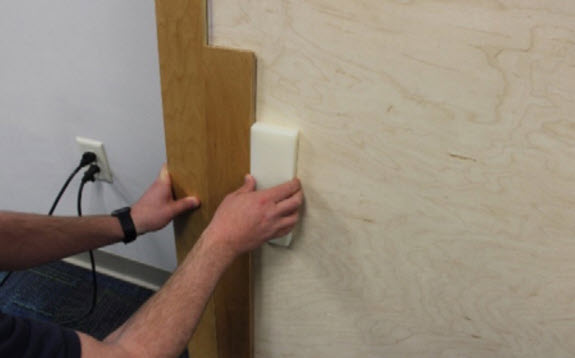
- Apply adhesive (in serpentine manner) to the second plank and place the plank on the wall such that the groove on the end of the plank can be engaged into the tongue of the first plank. A tapping block may be necessary to properly engage. (Figures 7 and 8) (If plank is wider than 5˝, apply Bruce® Everseal to the bottom of the groove on the ends of the planks).
- Face nail and blind nail the second plank in the same fashion as the first plank
- Repeat steps 14 and 15 until the first row is complete.
- After completing the first row, use a cut plank from the first row (if longer than 8˝) for the start of the second row.
- Place long edge groove of the first plank of the second row into the tongue of the first row. (Figure 9)
- For the second plank of the second row, place the long edge of the plank into the tongue of the first-row plank and engage the groove of the end into the tongue of the first plank of the second row (Figure 10) (If plank is wider than 5˝, place a bead of Bruce® Everseal along the bottom of the groove on the short ends.).
- Do not face nail the second row or subsequent rows. Only blind nail through the pocket above the tongue using the brad nailer. (Figure 11)
- Using this method continue installing planks on the wall. To achieve a random appearance, keep end joints of adjacent rows 6˝ apart throughout the installation.
- If necessary, the last row may need to be ripped with a table saw. Remember to maintain 1/4˝ of expansion space.
Installation Steps for a Vertical Installation:
- Install thin plywood (1/4˝) over existing drywall.
- Using tape measure the width of your wall to determine a balanced layout. You may have to cut the width of the first and last rows to maintain a balanced layout.
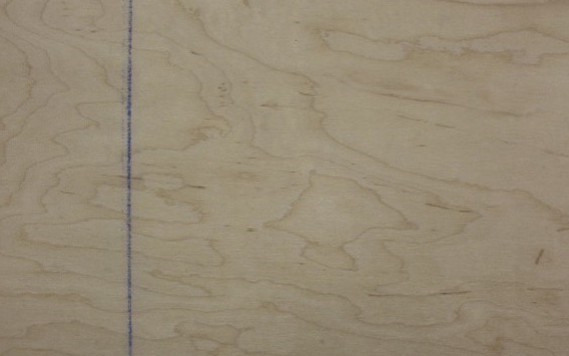
- Measure the width of your starting plank and add 1/4˝ to maintain your expansion space. Then place a pencil mark onto the wall at the top and bottom of the starting wall.
- Snap a chalk line along the starting wall. (Figure 12)
- Open at least 3 cartons of engineered wood to work from.
- Lay out engineered wood on the floor to arrange and see the desired visuals and to ensure proper blending of the natural variation in the wood.
- Connect the brad nailer to the air compressor and turn on the air compressor.
- Use 1-1/2˝ to 2˝ long brads.
- Place a premium urethane construction adhesive in the caulk gun and cut open the tip of the adhesive tube to achieve a 1/4˝ wide bead of adhesive.
- In a serpentine pattern, apply the adhesive to the back of the initial plank of the first row.
- Place plank on the wall such that the edge groove is facing left, and the end groove is facing up
- Face nail the plank where trim will cover the nail holes of the plank. Also, blind nail the plank through the pocket above the tongue. (Figures 13 and 14)

- Apply adhesive (in a serpentine manner) to the second plank and place the plank the wall such the bottom groove on the end of the plank can be engaged with the tongue of the first plank installed. A tapping block may be necessary to properly engage (If plank is wider than 5˝, apply Bruce® Everseal to the bottom of the groove on the ends of the planks)
- Then brad nail and blind nail the plank in the same manner as the initial plank.
- Repeat steps 13 and 14 until the first row is complete.
- After completing the first row, use a cut piece (if longer than 8˝) for the start of the second row.
- Place long edge groove of the first plank of the second row into the tongue of the first row.
- For the second plank of the second row, place the long edge of the plank onto the tongue of the first-row plank and engage the groove of the end onto the tongue of the first plank of the second row (Figure 15) (If plank is wider than 5˝, place a bead of Bruce® Everseal along the bottom of the groove on the short ends.).
- Do not face nail the second row or subsequent rows. Only blind nail through the pocket above the tongue using the brad nailer.
- Using this method continue installing planks on the wall. To achieve a random appearance, keep end joints of adjacent rows 6˝ apart throughout the installation.
- If necessary, the last row of planks may need to be ripped with a table saw. Remember to maintain a 1/4˝ expansions space.
Adjustments for a Wainscoting Installation:
- Using a tape measure, measure the width of your wall to determine a balanced layout. You may have to cut the width of the first and last rows to maintain a balanced layout.
- Measure the width of your starting plank and add 1/4˝ to maintain your expansion space. Then place a pencil mark onto the wall at the top and bottom of the starting wall.
- Wainscoting is usually 36˝ in height. A chalk line can be used vertically and horizontally. This will ensure that your installation is straight, and all the planks are cut the same length.
- Next, apply a serpentine bead of construction adhesive to the back of your starting plank. Then place onto the wall at your chalk lines. The groove on the long edge of the plank should be placed at the vertical chalk line. Then use a finish nailer to secure into place by nailing into the nail pocket above the tongue.
- Continue the installation by applying urethane construction adhesive to the back of each plank and engage the tongue and groove on the long edges. It may be necessary to use a tapping block to fully engage. The secure the plank with brad nails in the nail pocket above the tongue.
- Continue this same method until the wall is complete.
- After the installation of all your planks is completed then add your trim pieces. Starting with your base molding first, next add your chair rail trim to the top of your planks. Completing the installation, place the inside and outside trim
pieces onto the wall.
Adjustments for a Diagonal Installation:
A diagonal installation of engineered hardwood on walls is very similar to a horizontal installation. The main difference is that the entire installation is done at a 45° angle from the floor. Simply snap your initial chalk line at this 45° angle and proceed. For a diagonal installation of 45°, the planks that meet the perimeter of the installation will need to be cut on a 45° angle.
Accounting for Outlets and Switches:
If there are either outlets or switches on the wall, a jigsaw or coping saw can be used to cut the engineered hardwood to allow proper fit of the outlets or switches. First, remove the outlet covers so you can cut the engineered hardwood to fit around them, then reinstall the faceplate to hide the engineered hardwood, which may require a spacer between the outlet and the mounting box, or plastic washer beneath the cover and a longer screw to hold the faceplate to the outlet. Spark rings or box extenders may be used in some situations. This project requires experience working with tools, making accurate measurements, and working with drills and saws.
Completing the Installation:
After the installation is complete clean any adhesive that may be on the surface using low odor mineral spirits. Then simply clean the surface with Bruce® Hardwood and Laminate Floor Cleaner. Fill any holes with a coordinating filler to the color of the engineered hardwood. Recognizing that your wall dimensions will be slightly affected by varying levels of humidity within your building, care should be taken to control humidity levels within 30% to 50% to protect your investment and to assure that your wall installation provides lasting satisfaction.